Understanding the fish tank nitrogen cycle
Importance of cycling your aquarium
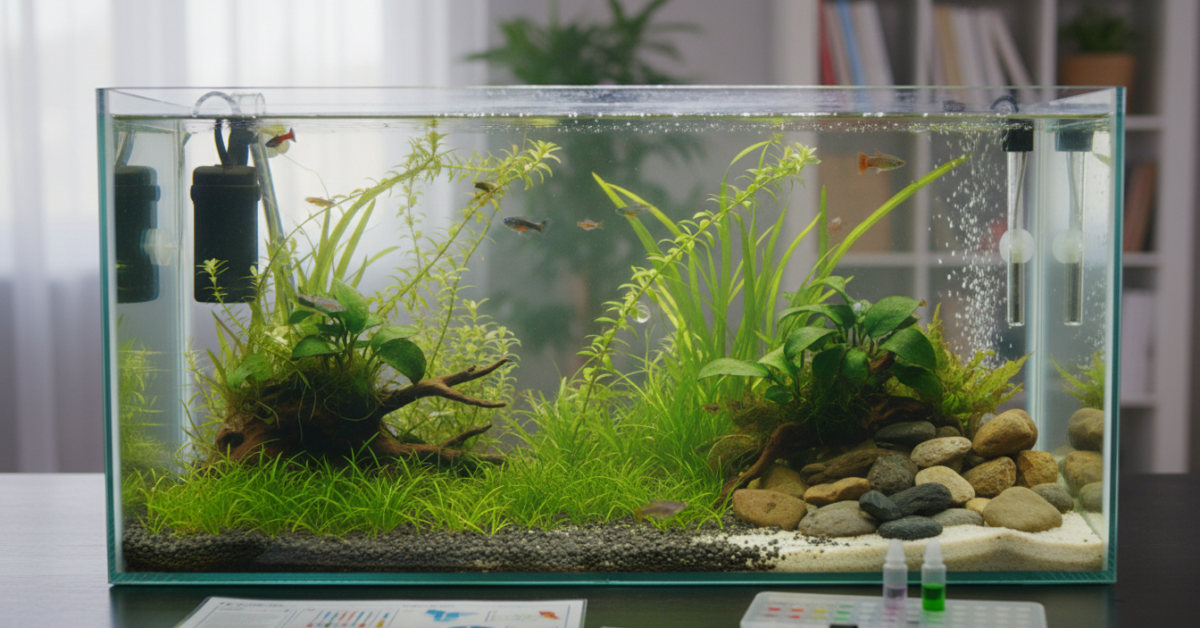
When setting up a new fish tank, the importance of this step cannot be overstated. Cycling your aquarium is the process of establishing beneficial bacteria that will break down harmful ammonia and nitrite, toxic by products of fish waste and decomposing material, into the less harmful form of nitrate. This natural cycle is essential for maintaining a healthy environment for your fish to thrive in.
At the end of the day, fish keeping all comes down to keeping good water.
Once your tank is cycled, your task will then be to keep the cycle going. This step is much easier, because, if you’re anything like me, you’ll likely find you naturally take a peek at it at least once a day. Which makes it much easier to notice if your fish, plants or even water are looking a little unhappy and warrant some intervention from your side. The best part is, if you keep your water healthy, you’ll only need to go through this cycling process once, as you can use a cycled tank to jump start any additional tanks in the future – see below for tips on this.
What you will need, at a minimum:
A fish tank
Water conditioner if using tap water (to neutralise chlorine and chloramines)
A filter with filter media
A source of ammonia (food source for the beneficial bacteria)
A water testing kit
Patience
How long does it take to cycle your aquarium?
The duration required to cycle your tank can vary, but most tanks typically take a few weeks, somewhere between 2 and 6 weeks. The cycle involves two main stages: the initial stage of converting ammonia to nitrite, which takes from a few days up to a week, and the second stage of converting nitrite to nitrate, which takes another one to two weeks. Nitrate is much safer, and can, in part, be removed by keeping live plants in your tank – otherwise this is where your maintenance water changes will come in down the line.
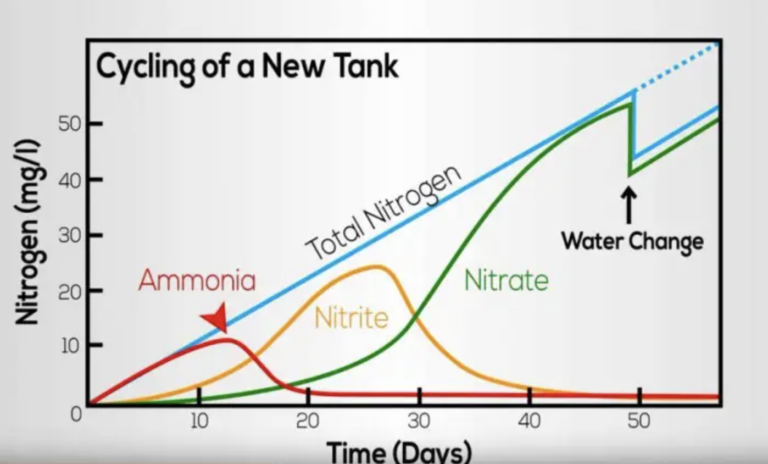
A constant presence of ammonia will encourage the population of the first type of bacteria needed for the cycle. These will eat ammonia and convert it to nitrite. You will be able to tell when these bacteria set up shop in your aquarium as ammonia levels will begin to lower and nitrite will start showing up when testing your water. Please note that the presence of any ammonia or nitrite in your tank is toxic to the fish in your tank (see table below).
It’s important to keep dosing ammonia once this happens, to keep the bacteria from this first step alive. However, now the presence of nitrite in the tank will enable the establishing of the second set of bacteria needed. These will consume the nitrite and transform it into the much less harmful nitrate. Once you start seeing this step happening in your water tests, you know you’re almost there.
The end goal being Ammonia 0, Nitrite 0, Nitrate >0. Noting that if nitrate in your tank is >40 once the other two are down to zero, it’s recommended that you do a water change before adding fish.
I know the thought of waiting up to 6 weeks when you’re excited to have your aquarium up and running feels like a lifetime. It is important, however, to give the bacteria time to establish throughout your tank – particularly in the substrate, filter cartridge and filter media. Don’t worry, there are some ways to speed this up. We’ll get to those in a little bit.
Several factors can impact the cycle duration:
Tank Size: Larger tanks may take longer to cycle. (But so worth it! They can fit more fish, and need less water changes as it is easier to keep the parameters stable and minimise a cycle crash.)
Water’s pH: A pH between 7.0 to 7.8 is ideal. But don’t stress too much on this if your water naturally sits just outside this range, as long as your fish will be able to survive in it.
Temperature: Room temperature will work, but warmer water can speed up the cycling process; ideally temperature between 28C to 30C. Do remember to reset this to the temperature needed for your chosen fish species before you add any in.
Understanding these factors and monitoring them closely can help expedite the cycling process and ensure a stable environment for your fish. For more insights on maintaining your new aquarium, check out our articles (coming soon) on what size filter do you need for your fish tank?, how often should you feed new aquarium fish?, and how long should you leave the aquarium lights on for?.
Methods to cycle your aquarium
There are several methods to successfully cycle your fish tank, each with its own benefits. I’ll delve into the two main approaches here: fishless cycling and fish-in cycling.
The Fishless Cycle
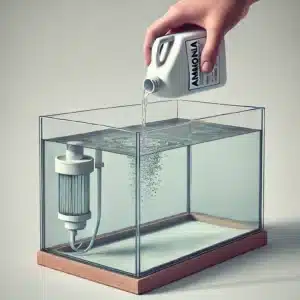
Fishless cycling is an excellent choice if you want to avoid harming fish during the cycling process. This method involves adding an ammonia source to the tank to establish the nitrifying bacteria (beneficial bacteria), and allowing the cycle to complete before adding fish. For a more detailed overview of how to do a fishless cycle, check out this article.
Here’s how you can do it:
Add an Ammonia Source: The goal is to raise the ammonia level to about 2-3 ppm (mg/L). Ammonia should be dosed throughout the cycling process to maintain equivalent levels to keep feeding the bacteria.
Monitor Ammonia and Nitrite Levels: Use a water test kit to check levels.
Wait for the Bacteria: It can take several weeks, but be patient. You should see a spike in nitrite levels followed by development of nitrate.
Water Changes: Perform partial water changes if levels get too high, but typically there’s no need to do this until just before popping fish in once the tank is cycled. (Aim to keep both ammonia and nitrite below 5 mg/L for optimum cycling speed.)
Cycle completion: Water test results read as Ammonia 0, Nitrite 0, Nitrate >0.
What ammonia source to use?
Fish food/dead prawn: Well, in lieu of using fish poop, some people will use fish food or even a dead prawn/shrimp. The benefits to this method are that you may already have these lying around, or be able to easily acquire them cheaply. These get added to the tank water, then, as they start to break down, they will release ammonia into the water and initiate the process. This method, however, does also come with a major drawback too. You have little control over the amount of ammonia being released into the tank at any one time, and will need to test frequently to determine when more or less is needed, else risk drawing out the whole process.
Pure ammonia: My personally-preferred method is dosing pure ammonia. This method gives you absolute control over the process, and I have been able to successfully cycle a tank in around 3 weeks using this method. You can even pre-calculate ammonia amounts to prepare the tank for a higher immediate fish load, or any species that are known to be a little messier, and minimise the risk of new tank syndrome (excess ammonia build up in the tank). This method will also help you to cycle a larger tank at an equivalent speed.
You may be fortunate enough to be able to buy pure ammonia from the store where you live. (Make sure it does not have anything else added to it. Note: Cloudy ammonia is not pure ammonia.) I personally can’t buy the pure stuff from my local stores, so pick it up online. My preferred source is Dr Tim’s, which also comes with a very handy dosing guide.
The Fish-In Cycle
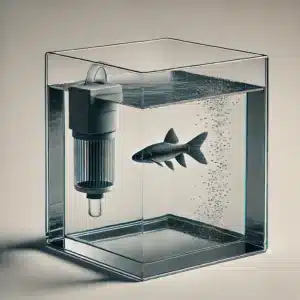
Fish-in cycling can be pretty controversial, and is not something I have chosen to do since I learnt of the other methods. A fish-in cycle involves adding a few hardy fish to initiate the nitrogen cycle. It requires careful monitoring of the water parameters and regular water changes to keep ammonia and nitrite at ‘safe’ levels. You cannot avoid, however, exposing those fish to toxic levels of both ammonia and nitrite during this process, which will burn the fish in the tank, particularly its gills that are needed to absorb oxygen. In my opinion, in addition to likely making the fish in your tank unhappy, this method takes a lot more work on your part, and will also take longer to complete, as the regular water changes needed to keep the fish alive (due to the build of of those toxic levels) will also down the development of the beneficial bacteria.
If this method is something that you wish to try, here’s the how to:
Add Hardy Fish: Add a maximum of three hardy fish to start. (Less is more in this situation when it comes to work on your part, and also judge numbers according to the size of your tank.)
Feed Sparingly: Feed them minimally to reduce waste buildup. Overfeeding can also cause ammonia spikes.
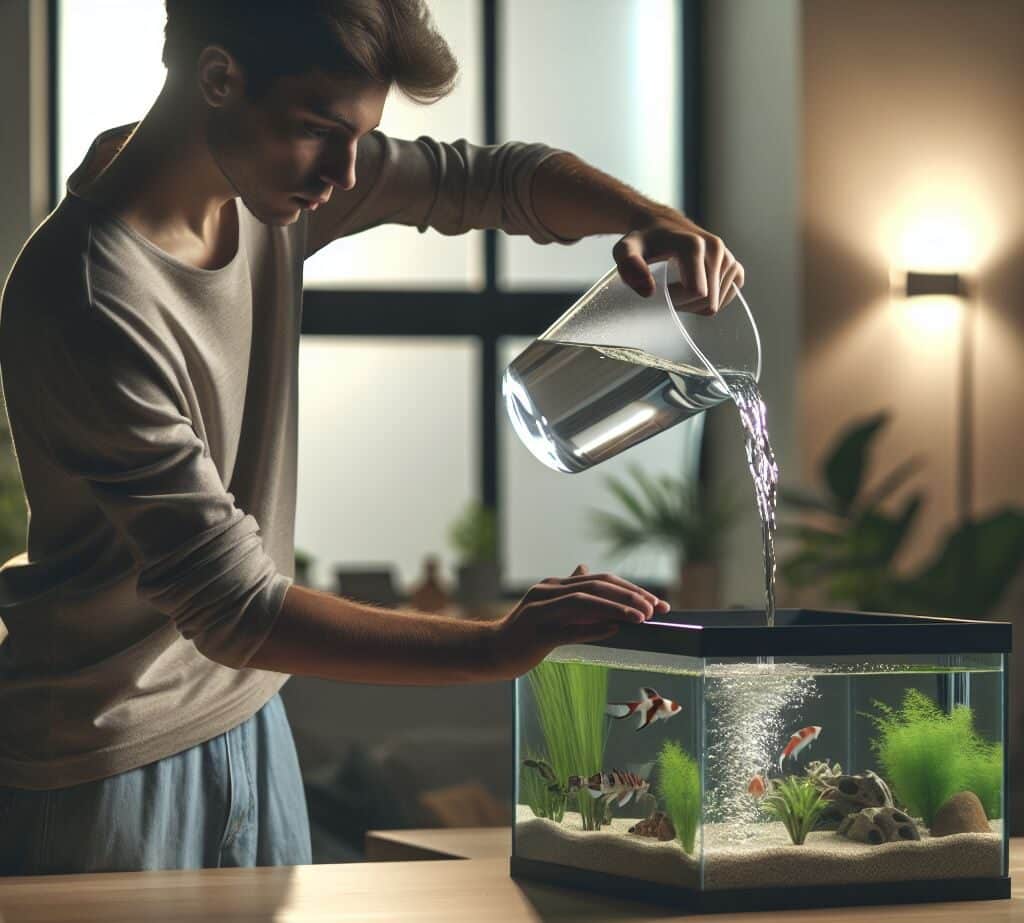
Frequent Water Changes: Perform daily or every-other-day partial water changes to manage ammonia and nitrite levels.
Monitor Closely: Check ammonia, nitrite, and nitrate levels regularly.
If doing this method, consider also adding a few varieties of fast-growing live plants to your tank to help stabilise the tank a little faster. Do remember that when using this method, patience is key. The tank will establish a stable ecosystem over time.
By understanding and choosing the best method for your situation, you can set up a thriving aquarium. Visit our guides (coming soon) on when should you do your first water change in a new fish tank and what size filter do you need for your fish tank? for further information on maintaining a healthy tank.
Accelerating the Cycling Process
Speeding up the cycling process of your new aquarium can ensure your fish thrive in a balanced and healthy environment more quickly.
Adding purchased beneficial bacteria ‘bottled bacteria’
Adding beneficial bacteria to your tank is an excellent way to expedite the cycling process. Bottled beneficial bacteria products are available which contain live nitrifying bacteria. When added to the tank, these bacteria inoculate your tank straight away with strains that work across the full nitrogen cycle, thus speeding up the whole process.
My favourite brands that I have used to do this are both Dr Tim’s and Seachem Stability [add links]. Adding products like these can reduce the time to cycle your tank down to around 1-2 weeks.
Including beneficial bacteria not only accelerates the cycle but also ensures the long-term health of your aquatic environment. For more details on maintaining water quality, see our guide on how to read your aquarium water test results.
Properly accelerating the cycling process ensures a balanced environment, preventing stressful conditions for your fish, and making it safe to add fish sooner. For advice (coming soon) on when to do this, visit when is it safe to add fish to a new fish tank?. For additional information on maintaining water quality and successful fish keeping, check out best water test kits for new fish keepers and best essential tools for new fish tank owners.
Seeding with established media
For use with either cycling method, seeding a new aquarium with a small amount of gravel or biological filter media from already cycled and established tank helps to speed up the entire process. These media instantly introduce small amounts of all of the needed beneficial bacteria, kick-starting the nitrogen cycle quickly. This enables immediate bio-filtration capabilities (at small levels) and helps to reduce the risk of ammonia and nitrite spikes. Again, adding this step can reduce the time to cycle your tank down to around 1-2 weeks.
See if a friend is happy to share some of their filter media to help you out with this method. Else, some local fish stores are also happy to oblige.
Tips for Seeding:
Use a small amount to avoid cloudiness
Ensure the donor tank is disease-free
Combine with live plants, if possible
How to instantly cycle your tank
Now there is a way to instantly cycle your new tank, but it comes with a catch – you need to have pre prepared. The theory behind this method is to keep a ‘back up’ filter running in an established tank. Best to give it at least 3 weeks for the media to become saturated with all those good, beneficial bacteria. Then, when the time comes for you to set up a new tank, easy peasy, pinch a bit of existing tank water and that already-running, back up filter, pop them into a new tank and good to go.
This is a great option if you want to be able to quickly set up a quarantine tank, worried about black outs (no power = no running filter = no cycle if left too long), or if you know that in the near future you might be setting up a new fish tank.
For this method, I personally keep a sponge filter running in the back of my tank. These are simple filters that run off an air pump. Meaning that while it’s doing its thing at the back of my tank, it’s also adding extra oxygen to the water (so no air stone needed). As you can also buy battery powered air pumps, it gives you that back up in case of a power cut – win-win!
Do note that these are typically lower flow filters, so, if setting up a bigger tank, I recommend getting a larger filter to run side by side and fill up with all of the good bacteria from the sponge filter over the next few weeks once the tank is up and running. And because of this, still remember to add those fish gradually and keep an eye on your water parameters.
I appreciate that this option will not be available to everyone the first time around, but do have a think in case any of your friends might have space in their tank to house a sponge filter for a few weeks to help you out.
A successfully completed cycle
Signs of a Cycled Tank
So, when do you know that you’ve successfully established a healthy colony of nitrifying bacteria and it’s safe for you to start introducing fish?
Zero Ammonia and Nitrite Levels: A tank is considered cycled when ammonia and nitrite levels read zero parts per million (ppm). Regular testing with a reliable kit is essential to confirm this. For an in-depth guide, see our how to read your aquarium water test results.
The presence of Nitrates: Detecting nitrates indicates that the bacteria are effectively converting ammonia and nitrite. Ideal nitrate levels should be below 40 ppm.
New Plant and Algae Growth: Observing new growth in plants or algae can be a good indicator. This signifies that the environment is conducive to life and that plants are consuming ammonia and nitrates. You can supplement the growth of plants in your tanks using with liquid fertilizers and root tabs.
Gradually Introduce Fish
After confirming that your tank is cycled, it’s time to introduce fish yay! Start this slowly. Adding too many fish at once can unbalance the tank, causing spikes in ammonia and nitrite levels. Remember, you’ll need to give the bacteria in your tank time to grow and adjust to the higher ammonia production rates created by having more fish in your tank.
Start with a Few Fish: Introduce a few hardy species initially. This prevents overloading the biological filtration system. Refer to our guide (coming soon) on the best hardy fish species for beginners.
Monitor Water Parameters: Continue monitoring ammonia, nitrite, and nitrate levels regularly. It’s normal for parameters to fluctuate slightly, but they should restabilise quickly.
Avoid Overfeeding: Overfeeding can increase ammonia levels. It’s advisable to feed sparsely and remove any uneaten food. Learn more about how often you should feed new aquarium fish to prevent overfeeding (coming soon).
Gradual Increase: Gradually add more fish over a period of weeks, ensuring each addition does not disrupt the established balance of the tank.
By following these steps, you can ensure a smooth transition for your fish into their new home. For additional insights and tips, check out our article on when is it safe to add fish to a new fish tank?.
Troubleshooting
Regular Water Testing
Keeping your aquarium’s water chemistry balanced is essential for the health of your fish. Regular water testing helps you catch any issues early, ensuring your tank remains a happy and healthy environment for your aquatic friends. For more detailed guidance, refer to our article (coming soon) on how to read your aquarium water test results.
Frequency: Test the water weekly for the first few months and then switch to bi-weekly or monthly tests once the tank is stable. With time, you’ll learn the frequency that your tank will need water changes with its stocking level. Do keep an eye on things though, and if your water looks off or fish or plants start to look unhappy, a water change is normally a good place to start.
High Ammonia Levels (>0 ppm)
High ammonia levels can be addressed by performing partial water changes, reducing feeding avoiding over stocking, and adding an ammonia neutralising product or beneficial bacteria. You can learn more about this in our article (coming soon) on how to lower ammonia in a new tank.
High Nitrite Levels (>0 ppm)
Using products with live beneficial bacteria or nitrite neutralising compounds can help manage nitrite levels. Adding an aerator or bubbler can also aid in this process. Reduce feeding. If in doubt, do a partial water change.
High Nitrate Levels (>40 ppm)
Regular partial water changes, proper filtration, and the use of live plants can help keep nitrate levels in check. It could also be worth testing your tap water if they seem to climb quickly after each water change. For more information, check our article (coming soon) on when should you do your first water change in a new fish tank.
Regularly monitoring these three key parameters will help you maintain a healthy and balanced environment for your fish. If you need more guidance on reading your test results, visit our guide on how to read your aquarium water test results.
Together these points should take you through the basics of cycling your first fish tank. Best of luck with it all and happy fish keeping!

