You’ve got your plants picked out, your aquarium ready, and now you’re staring at a wall of substrate options wondering which one will actually help your plants grow rather than just sit there looking pretty. Let me save you some headaches right now: choosing the right aquarium substrate for plants isn’t about buying the most expensive bag on the shelf.
The substrate sitting at the bottom of your tank does way more than anchor roots. It’s a nutrient reservoir, a biological filter, and honestly, it can make the difference between plants that barely survive and ones that actually flourish. Getting this foundation right means less work for you down the road and a planted tank that looks spectacular without constant intervention.
Why Your Substrate Choice Actually Matters
Here’s something most beginners don’t realize: planted tank substrate actively participates in plant nutrition through a process called cation exchange capacity (CEC). Essentially, substrates with high CEC can hold onto positively charged nutrients like potassium, magnesium, and iron, then release them to plant roots when needed. It’s like having a slow-release fertilizer built right into your aquarium floor.
Clay-based substrates and certain soils have remarkably high CEC values, sometimes reaching 20-30 meq/100g. Compare that to inert sand or gravel with basically zero CEC, and you start understanding why some people get amazing plant growth while others struggle despite similar lighting and CO2 setups.
Water chemistry also gets influenced by your substrate choice. Active substrates can lower pH and soften water, which sounds great until you realize you’ve got fish that prefer alkaline conditions. This is where planning ahead saves you from a chemistry nightmare later.
The Main Types of Plant Substrates Explained
Nutrient-Rich Active Substrates
Active substrates like aqua soil contain volcanic soil, organic matter, and minerals that actively buffer your water parameters. These products initially release ammonia as they break down during the first few weeks, which means cycling your tank before adding livestock isn’t optional, it’s absolutely necessary.
The ammonia spike can reach 2-4 ppm in the first week with some brands. Sounds scary, but it kickstarts your beneficial bacteria colonies beautifully. Just don’t rush it. Most active substrates last between 12-24 months before their nutrient content depletes and buffering capacity diminishes, though they’ll still function as a decent root anchor afterward.
One thing people rarely mention: these substrates are surprisingly lightweight when first submerged. If you’ve got powerful filters or boisterous fish, you might see substrate getting kicked up everywhere until it becomes waterlogged after a few days.
Inert Substrates with Added Nutrients
Maybe you don’t want your substrate messing with water parameters. Inert substrates like sand, gravel, or specialized gravels give you complete control. They won’t alter pH, won’t soften water, and won’t surprise you with unexpected chemistry changes six months down the line.
The catch? Plants need to get their nutrition almost entirely from the water column or root tabs you manually insert. This approach works brilliantly if you’re already dosing liquid fertilizers and running CO2, but it demands more attention from you. Think of it as the difference between slow-cooking a meal versus ordering takeout, both can work, but the effort level differs significantly.
Grain size matters more than most people realize. Substrates with 1-2 mm particles compact less and allow better water circulation through the root zone compared to ultra-fine sand. Better circulation means more oxygen for roots and less chance of developing anaerobic pockets that smell like rotten eggs.
Layered Substrate Systems
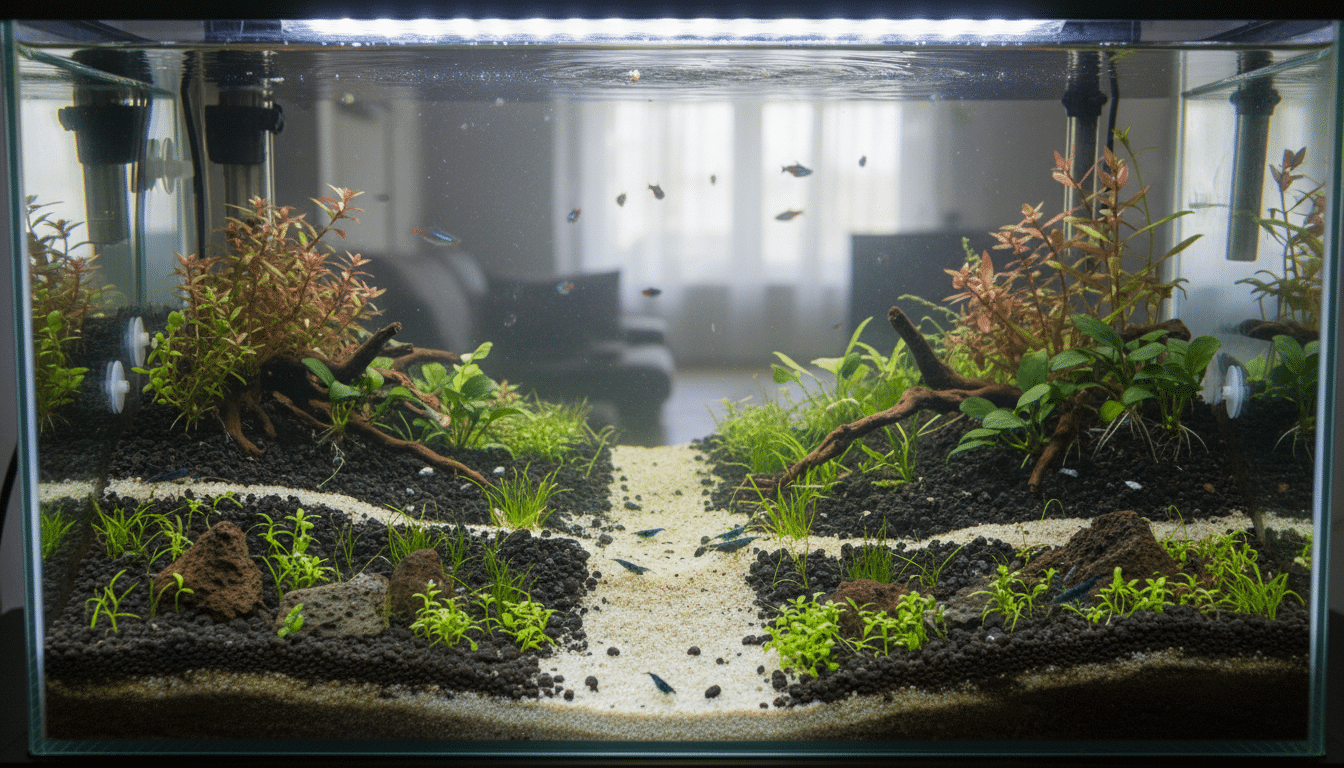
The layered substrate approach combines a nutrient-rich base layer with an inert cap layer on top. You get sustained root nutrition from below while maintaining aesthetic flexibility up top. This method became popular in the 1990s with Takashi Amano’s Nature Aquarium style and remains incredibly effective today.
A typical setup uses 2.5-5 cm (1-2 inches) of nutrient-rich soil or clay substrate as the base, topped with 2.5-5 cm (1-2 inches) of cosmetic sand or fine gravel. The cap prevents the nutrient layer from clouding your water and gives you flexibility in choosing your final appearance.
Here’s where it gets interesting: the cap layer shouldn’t be too coarse. If gaps between particles are too large, your nutrient base can migrate upward and create muddy patches. Conversely, too fine a cap can create an impermeable barrier that limits root penetration. You’re aiming for that Goldilocks zone.
Matching Substrate to Your Plant Selection
Not all aquatic plants interact with substrate the same way. Root feeders like Amazon swords, cryptocorynes, and vallisneria absolutely depend on nutrient-rich substrate for proper growth. Their root systems can extend 15-20 cm (6-8 inches) deep, actively pulling nutrients from the substrate layer.
Meanwhile, plants like java fern, anubias, and most mosses are water column feeders that attach to hardscape rather than rooting in substrate. For these guys, your substrate choice barely matters to their nutrition. You could grow them successfully on bare glass if aesthetics weren’t a concern.
Carpeting plants fall somewhere in between. Species like dwarf hairgrass and monte carlo benefit from nutrient-rich substrate, but they’re relatively shallow-rooted and can adapt to various substrate types as long as you’re dosing the water column consistently. The substrate mainly provides them with a stable anchoring point as they spread.
What about depth? Heavy root feeders appreciate 7.5-10 cm (3-4 inches) of substrate minimum, while carpeting plants work fine with just 5 cm (2 inches). Going too shallow means limited nutrient reserves and unstable planting, but excessive depth in areas without plants creates dead zones where debris accumulates and beneficial bacteria struggle to colonize.
The Setup Process That Prevents Problems
Rinsing substrate before adding it saves you hours of cloudy water, except with active soils, which you should never rinse since you’ll wash away the beneficial components. For everything else, rinse until the water runs clear. Yes, it’s tedious. Yes, it’s worth it.
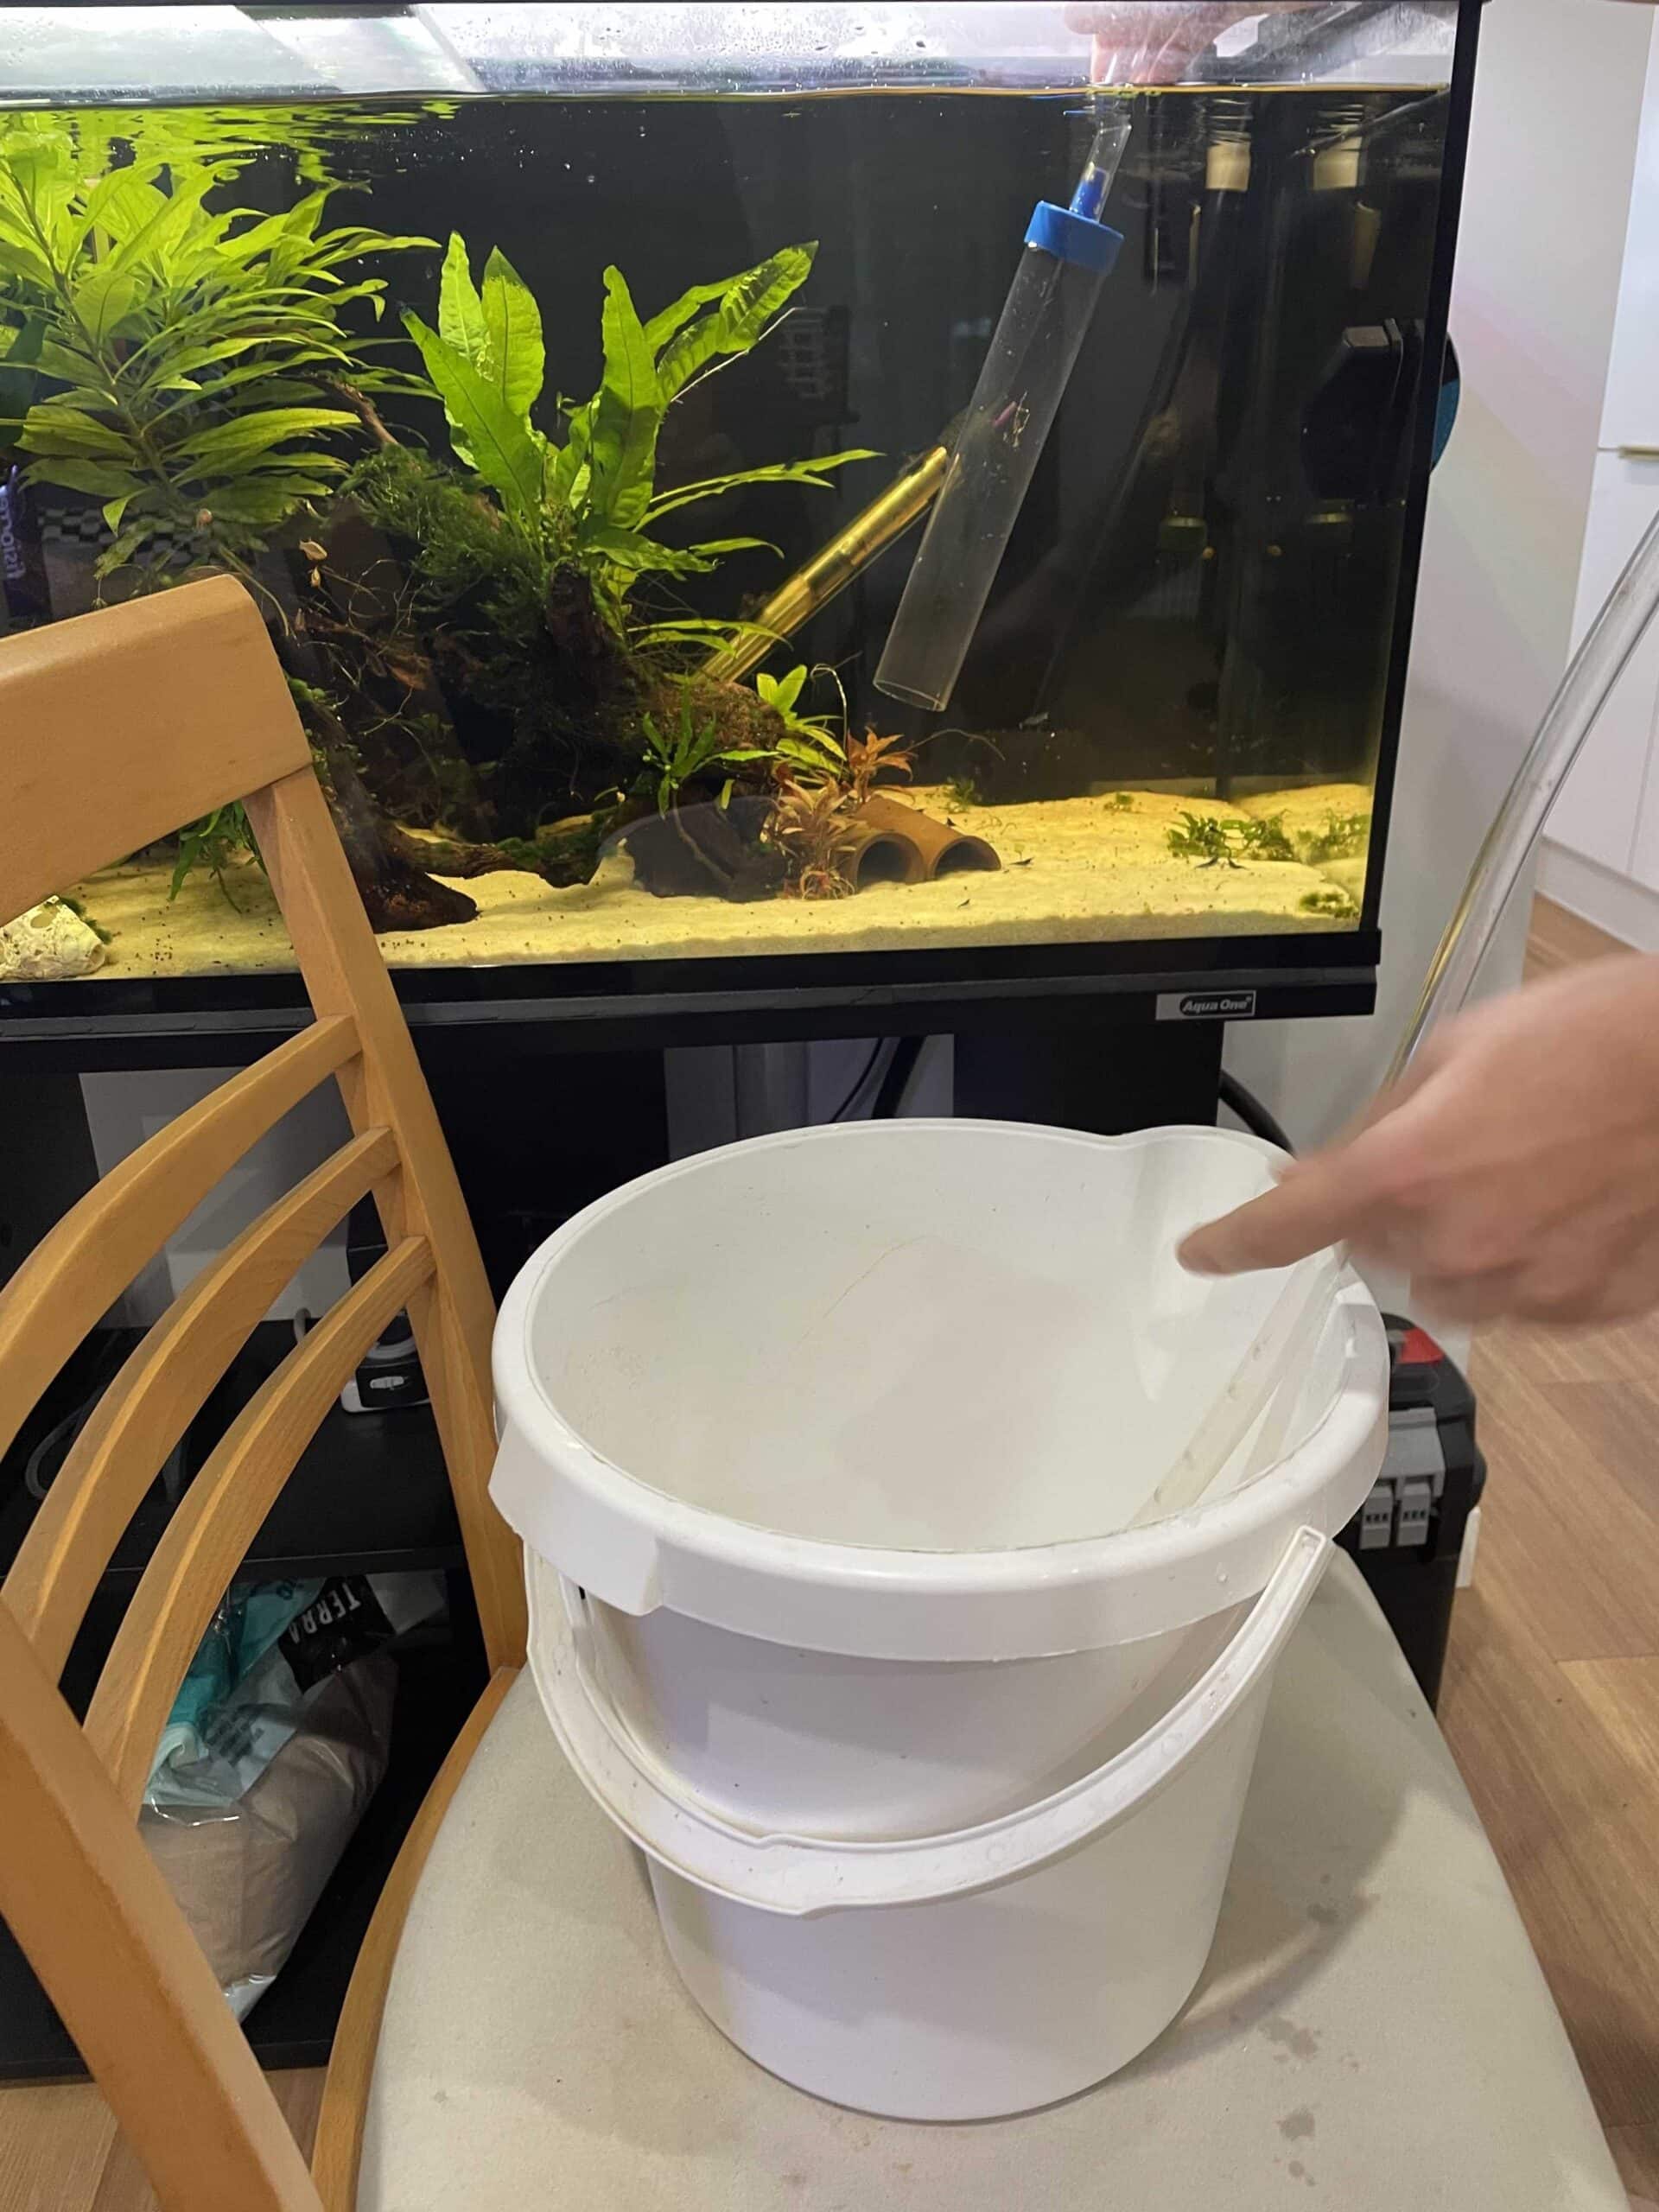
When adding substrate to your tank, work with a dry tank whenever possible. Pouring substrate into water creates cloudiness and makes it impossible to create slopes or contours accurately. If you must add substrate to an established tank, use a cup or PVC pipe to guide material directly to the bottom, minimizing water disturbance.
Creating depth variations makes your tank look larger and more natural. Slope your substrate from back to front, perhaps 10 cm (4 inches) deep at the rear wall tapering to 5 cm (2 inches) at the front. This technique, called aquascaping slope, uses forced perspective to create visual depth and naturally guides debris toward the front where it’s easier to remove during maintenance.
Here’s a pro move: add root tabs even to nutrient-rich substrates in areas where you’re planting heavy feeders. Think of it as insurance. Those concentrated nutrition pockets give new plants an immediate advantage while establishing, reducing that vulnerable period where they’re adapting to your water conditions.
Maintaining Your Substrate Long-Term
Over time, substrate compacts from its own weight, debris accumulation, and the constant water pressure. Compacted substrate restricts oxygen flow to roots and can create those anaerobic zones we mentioned earlier. The fix? Gently disturb the surface layer during water changes using your fingers or a chopstick, working carefully around plant roots.
Don’t go digging like you’re searching for buried treasure. Light disruption of the top 1-2 cm (0.5-1 inch) releases trapped gases and refreshes the surface. If you’ve got burrowing snails like Malaysian trumpet snails, they’ll handle much of this maintenance automatically as they tunnel through substrate nightly.
Active substrates eventually exhaust their buffering capacity and nutrient reserves. You’ll notice when your pH starts creeping upward despite the substrate previously keeping it stable. At this point, you can either replace the substrate entirely (which is disruptive) or supplement heavily with root tabs and liquid fertilizers to compensate. Most people choose the supplement route and only replace substrate during complete tank rebuilds.
Algae sometimes colonizes substrate surfaces, especially in high-light areas. This isn’t necessarily bad since some algae growth is normal in healthy tanks, but excessive coating can prevent gas exchange and look unsightly. Shrimp and bottom-feeding fish like corydoras help manage this naturally by constantly grazing and stirring the surface.
Common Mistakes That Cost You Time and Money
Buying substrate based purely on appearance is like choosing a car because you like the color. Sure, that bright white sand looks stunning initially, but it shows every bit of debris and often lacks the properties plants actually need. Function should drive your decision, with aesthetics as a secondary consideration.
Another frequent error involves insufficient substrate quantity. Calculate your needs before shopping: multiply your tank’s length by width in centimeters, multiply by desired depth, then divide by 1000 to get liters needed. A 100 liter (26 gallon) tank typically needs 15-20 kg (33-44 lbs) of substrate for proper depth, yet people commonly buy half that amount and wonder why their plants won’t stay anchored.
Mixing incompatible substrate types creates problems too. Combining active soil with coral sand, for example, pits the soil’s acidifying properties against the coral’s alkaline buffering. The result? Unstable pH that swings unpredictably as these materials compete for chemical dominance. Stick with compatible materials or use distinct separation if you absolutely must combine different types.
Perhaps the biggest mistake involves rushing the process. Adding fish the same day you set up a new active substrate tank is asking for ammonia poisoning issues. Give your tank at least 3-4 weeks to cycle properly, testing water parameters regularly until ammonia and nitrite consistently read zero and nitrates are detectable.
Making Your Final Substrate Decision
Your ideal substrate choice depends on your specific situation. Running a low-tech tank with minimal equipment? Active substrates provide built-in nutrition and reduce your maintenance workload. Operating a high-tech planted tank with CO2 injection and consistent fertilizer dosing? Inert substrates give you precise control without unwanted chemical interference.
Budget plays a role too. Active substrates typically cost 2-3 times more than basic aquarium sand or gravel, though they provide more initial nutrition. If you’re setting up a large tank like a 200 liter (53 gallon) display, substrate costs can reach 100-150 dollars for premium products. Layered systems offer a middle ground by using smaller quantities of expensive materials where they matter most.
Consider your commitment level honestly. Will you remember to add root tabs every few months? Can you maintain a liquid fertilizing schedule? If the answer involves any hesitation, lean toward substrates that handle more of the nutritional load themselves. There’s no shame in choosing convenience when it means you’ll actually enjoy the hobby instead of treating it like a chore.
Test your water parameters before making final decisions. If your tap water already has high GH and KH with a pH above 7.5, active substrates might fight a losing battle trying to soften it. You could end up wasting money on properties you’ll never actually utilize. Sometimes working with your existing water chemistry rather than against it produces better results with less effort.
Setting Yourself Up for Success
The substrate underneath your aquatic plants does serious heavy lifting despite being mostly invisible once your tank matures. Getting this foundation right from the start means your plants establish faster, grow more consistently, and require less troubleshooting down the road. It’s worth spending the extra hour researching and planning now rather than dealing with preventable problems for months afterward.
Remember that perfect is the enemy of good enough. You don’t need the most expensive substrate on the market to grow healthy plants. You need substrate that matches your specific tank parameters, plant selection, and maintenance style. Focus on those compatibility factors rather than chasing premium brands that might not actually suit your situation.
Your substrate choice isn’t permanent either. Tanks evolve, priorities shift, and sometimes you just want to try something different. Many people completely rescape their tanks every few years, which provides the perfect opportunity to experiment with different substrate approaches. Start with something appropriate for your current knowledge level and equipment, then adjust as you gain experience and figure out what works best for your specific situation.