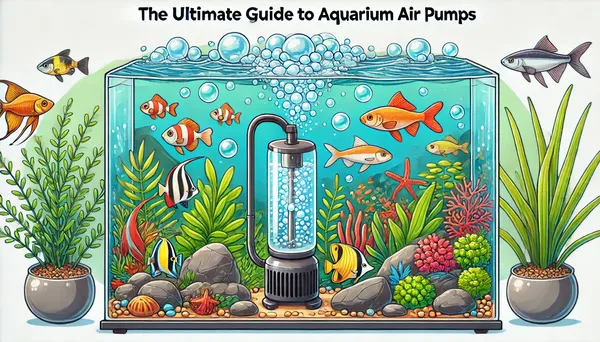
You’re staring at the corner of your aquarium where water’s seeping out drop by drop, or maybe you’re planning to build your first custom tank from scratch. Either way, you’ve landed in the right place to talk about aquarium silicone. This unassuming sealant is literally what stands between your beautiful underwater world and a flooded living room, so let’s dive into what makes it special and how to use it properly.
Why Aquarium Silicone Isn’t Just Any Old Sealant
Here’s something most people don’t realize: regular bathroom or construction silicone contains toxic additives like fungicides and mildewcides that can slowly poison your fish. Aquarium-safe silicone is specifically formulated without these biocides, making it non-toxic once fully cured. That’s not just marketing speak; it’s a genuine chemical difference that matters to the health of your aquatic pets.
The most common type you’ll find is 100% silicone rubber with an acetic acid cure system (that’s the vinegar smell when it’s curing). This cure mechanism actually works better for aquarium applications because it creates superior adhesion to glass and reaches full strength faster than neutral-cure alternatives.
Clear vs. Black: Does Color Really Matter?
Walk into any aquarium store and you’ll see both clear and black silicone tubes. The black version isn’t just for aesthetic purposes, though it does hide algae growth and gives tanks a finished look. Black silicone actually contains carbon black pigment, which provides UV stability and slightly improves tensile strength. We’re talking about a marginal difference of maybe 5-10%, but when you’re holding back hundreds of litres of water, every bit counts.
Clear silicone lets you see the bead quality and check for air bubbles during application, which makes it ideal for repairs where you need visibility. I’ve found black works better for new builds where you want clean sight lines, while clear is your friend when fixing existing tanks.
How Strong Is This Stuff Really?
Quality aquarium silicone has a tensile strength of around 400-500 PSI when fully cured. To put that in perspective, a 200-litre (53-gallon) tank puts roughly 2-3 PSI of pressure on the bottom seams. The silicone is doing more than just holding water though; it’s also acting as a flexible gasket that accommodates slight glass flexing and absorbs shock.
Here’s what surprised me when I first learned it: the silicone in a properly built aquarium isn’t actually gluing the glass together like you’d think. It’s creating a waterproof seal while relying on the structural integrity of the glass panels themselves. That’s why frame design and glass thickness matter so much for larger tanks.
Temperature Matters More Than You Think
Most aquarium silicone products cure best between 21-27°C (70-80°F) with moderate humidity around 40-60%. Too cold, and the curing reaction crawls along painfully slow. Too hot or too humid, and you get rapid surface skinning that can trap solvents underneath, creating weak spots in your seal.
I once tried sealing a tank in my garage during winter when temperatures dipped to 10°C (50°F). After three days, the silicone still felt tacky. Don’t be that person. Bring your project indoors or wait for better conditions.
The 24-Hour Myth and Actual Cure Times
Every tube says “wait 24 hours before filling,” but that’s really the minimum time before the silicone is touch-dry and won’t smear. Full cure for aquarium silicone actually takes 5-7 days at room temperature. The curing process works from the outside in, typically advancing about 3mm (1/8 inch) per day.
For a standard 6mm (1/4 inch) bead on a small repair, you can probably get away with filling after 48 hours. But for a new tank build with thick structural beads? Give it the full week. The difference between partially cured and fully cured silicone is significant in terms of maximum strength and chemical resistance.
Application Secrets That Actually Work
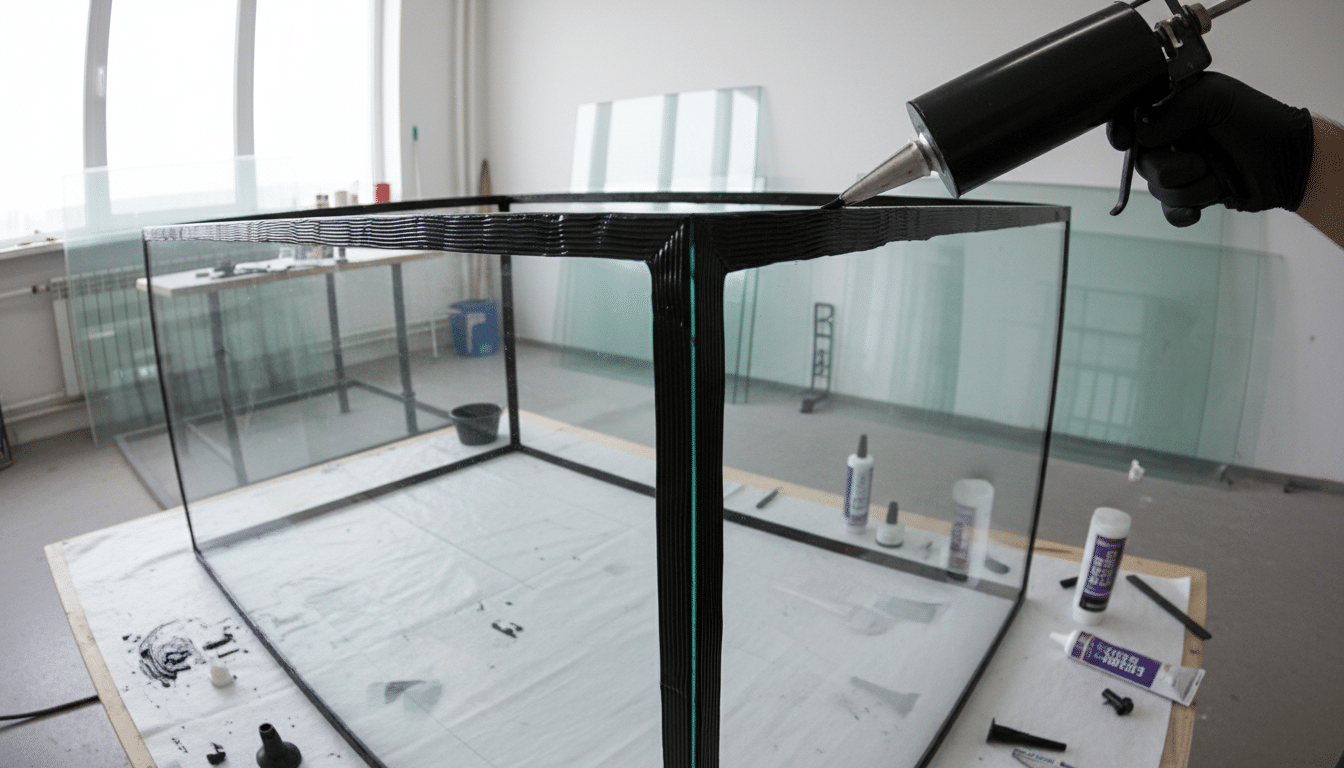
Let’s talk technique, because even the best silicone fails if you apply it poorly. The surface preparation matters enormously. You need glass that’s not just clean but chemically clean. Wipe down with isopropyl alcohol (90% or higher) and let it fully evaporate. Any oils, soap residue, or moisture will create weak adhesion points.
When laying a bead, consistent pressure is your goal. Too much pressure and you’ll squeeze out all your silicone, leaving barely any material to create a seal. Too little and you’ll get air pockets and gaps. The sweet spot feels like spreading cold butter on toast; firm but controlled.
Here’s a trick that changed my sealing game: use a wet finger or wet plastic spoon to smooth the bead immediately after application. The water prevents the silicone from sticking to your tool while creating a clean, concave profile that’s actually stronger than a rounded bead. You have about 5-10 minutes of working time before surface skinning begins, so move with purpose.
When Repairs Make Sense and When They Don’t
Small leaks at seams can absolutely be fixed if you catch them early. The key question is whether the leak indicates structural failure or just seal failure. If the glass itself is flexing or you see separation between panels, you’re looking at a rebuild, not a repair.
For legitimate seal repairs, you’ll need to remove the old silicone completely. A razor blade works for the bulk of it, but you need to get down to bare glass for proper adhesion. Any silicone residue left behind creates a weak point because new silicone bonds poorly to old cured silicone; it’s not like welding metal where old and new truly fuse together.
Repairs on empty tanks have a much higher success rate than trying to patch an active leak. Physics doesn’t negotiate; water pressure finds every microscopic gap you leave in your repair work.
Brand Differences That Matter
The market leaders like GE Silicone I, Momentive RTV108, and ASI Aquarium Sealant all use similar base formulations, but there are subtle differences. Some include additional plasticizers for flexibility, others optimize for faster tack-free time. The shore hardness (typically Shore A 20-30 for aquarium applications) varies slightly between brands, affecting how rigid or flexible the final seal feels.
What really matters is verifying the product is explicitly labeled aquarium-safe or for potable water contact. Don’t trust clear packaging that looks right; read the technical data sheet if you’re unsure. I’ve seen people accidentally buy door and window sealant thinking it was aquarium-grade, only to discover dead fish a week later.
Storage and Shelf Life Reality
That partially used tube in your tool drawer? It’s probably garbage if it’s been more than a year. Silicone sealant has a shelf life of roughly 12-18 months from manufacture, even in an unopened tube. Once opened, moisture from air exposure begins curing the material inside the tube. You’ll know it’s gone bad when the silicone comes out chunky or stringy instead of smooth.
Store tubes nozzle-up in a cool, dry place. Some people stick a long nail or screw in the nozzle to seal it between uses, which actually works pretty well for extending usability by a few months.
Safety Considerations Nobody Mentions
The acetic acid released during curing isn’t just smelly; it’s genuinely irritating to your respiratory system in enclosed spaces. Work in ventilated areas, especially when doing large sealing jobs. That vinegar smell is literally acetic acid vapor, and prolonged exposure gives some people headaches or throat irritation.
Uncured silicone is also messy in ways you don’t anticipate. It transfers to everything you touch and spreads like some kind of science experiment gone wrong. Keep paper towels and that isopropyl alcohol nearby for cleanup. Once it cures on fabric or porous surfaces, it’s essentially permanent.
The Bottom Line on Aquarium Silicone
Choosing and using the right silicone isn’t complicated once you understand the basics. Get aquarium-specific product, prepare surfaces properly, apply with care, and give it adequate cure time. Those four principles will serve you well whether you’re patching a drip or building a showpiece 500-litre (132-gallon) reef tank.
The material itself is remarkably forgiving and strong when used correctly. It’s flexible enough to handle thermal expansion and vibration, yet forms bonds that can last decades. Take your time, follow the fundamentals, and your seals will hold strong for years to come. And if something does start leaking down the road? Well, now you know exactly how to fix it properly.